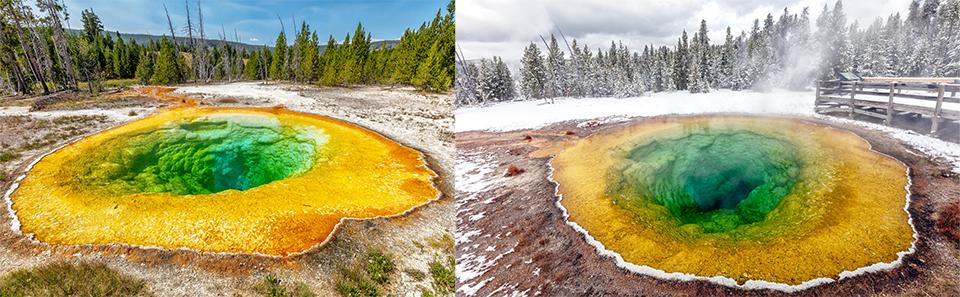
Summer and autumn views of Morning Glory Pool, Upper Geyser Basin, Yellowstone National Park / Rebecca Latson
Many of you visiting a unit within the National Park System capture photos for more than just Instagram, right? Maybe those shots will accompany a blog post, report, or other online/paper publication. How you photographically document your subject determines the extent to which your viewing audience will understand and appreciate that feature, concept, or process you’ve captured.
I don’t know about you, but as a photographer, I cast a somewhat critical eye to photos in the identification books I pack with me. Some images are gorgeous and provide great representation of a specific item, scene or process, while other images don’t exactly demonstrate that which I have seen with my own eyes. I firmly believe in producing nice, recognizable, representative imagery for not only my own photo website, but for Traveler articles and any other publication for which I include photos. You should feel the same way about your photos, whether you use them for documentation or wall art.
Let’s start with lighting. If you’ve read both my 2014 article and recent April article about how the same spot in a national park may appear different during various seasons, times of day, and weather conditions, then you’ll know it’s a good idea to visit and photograph that same spot more than once. For example, the images at the top of this article of Morning Glory Pool at Upper Geyser Basin in Yellowstone National Park were captured during summer and autumn visits. The angle of the sunlight and the overall atmospheric light has slightly modified the brilliant colors indicating water temperatures.
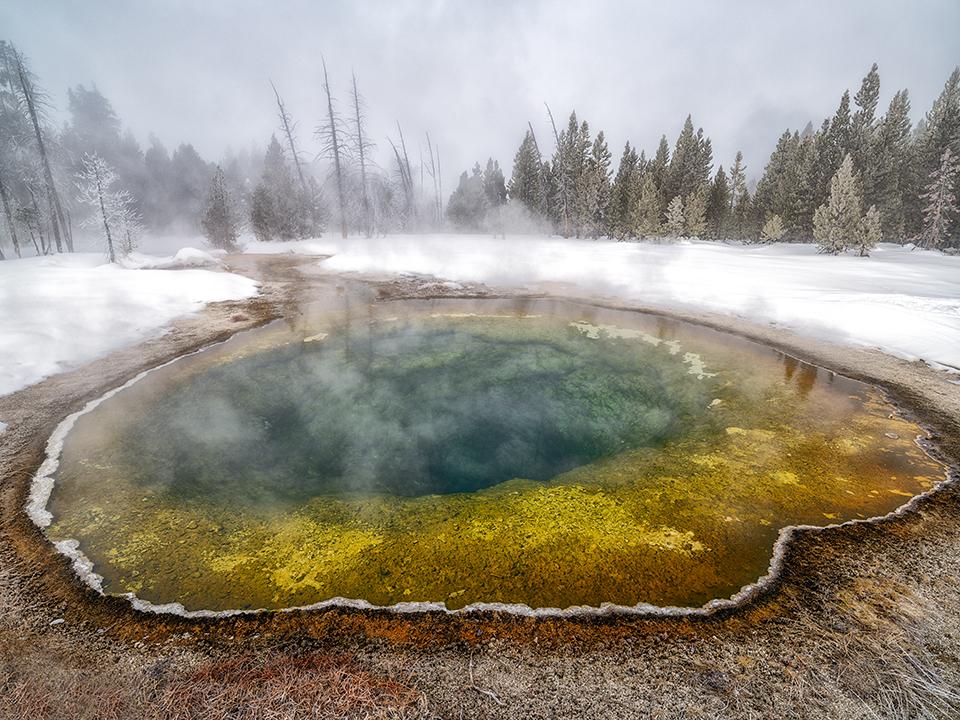
A winter view of Morning Glory Pool, Upper Geyser Basin, Yellowstone National Park / Rebecca Latson
Now, compare the summer and autumn views above with this winter image photographed on a cloudy day with an atmospheric blue cast. As you can see light quality with respect to the subject definitely makes a difference in the shade, saturation, and brightness.
Here’s another example of how light changes a landscape’s mood and colors. These two images of the same area within the Painted Hills Unit at John Day Fossil Beds National Monument were photographed on the same day, two hours apart.

Painted Hills landscape two hours apart, John Day Fossil Beds National Monument / Rebecca Latson
Light is not the only factor which can modify your photo subject’s looks.
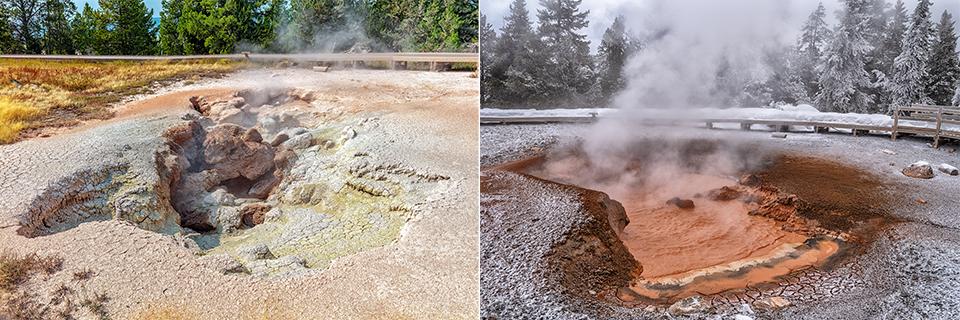
Summer and winter views of Red Spouter at Fountain Paint Pots, Yellowstone National Park / Rebecca Latson
Yellowstone National Park’s Red Spouter is a great example of appearance alteration due, not to light, but to the presence or absence of water. This thermal feature at Fountain Paint Pots resulted from the 7.3-magnitude Hebgen Lake earthquake. As the seasons change, so does Red Spouter’s water phase, from fumarole to mud pot to hot spring, depending upon the height of the water table beneath the surface, according to the NPS. If your subject changes with time, it’s a good idea to photograph those variations.
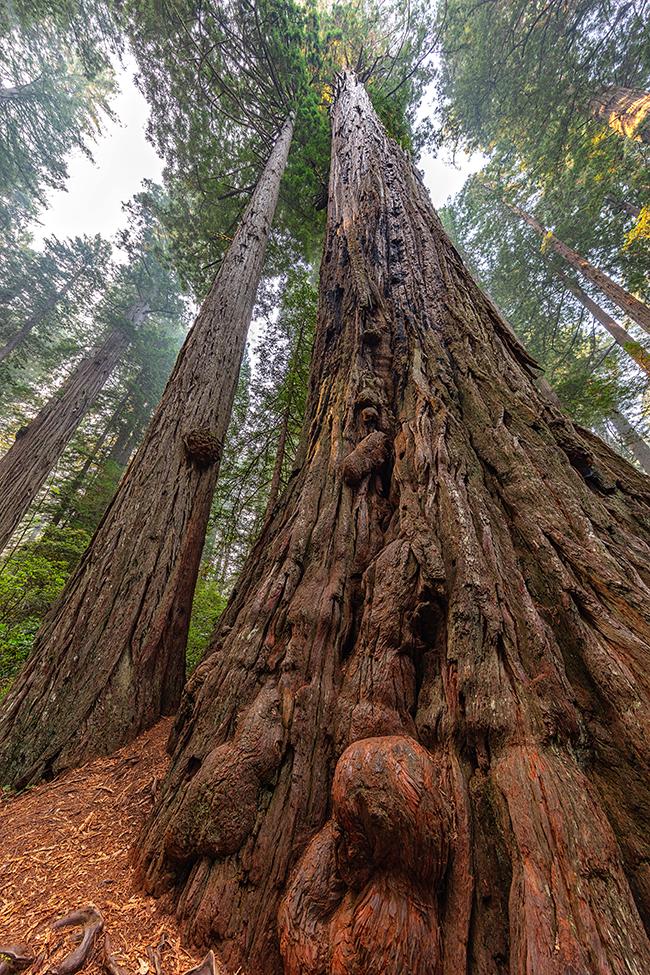
Burls at the base of this coastal redwood tree, Redwood National and State Parks / Rebecca Latson
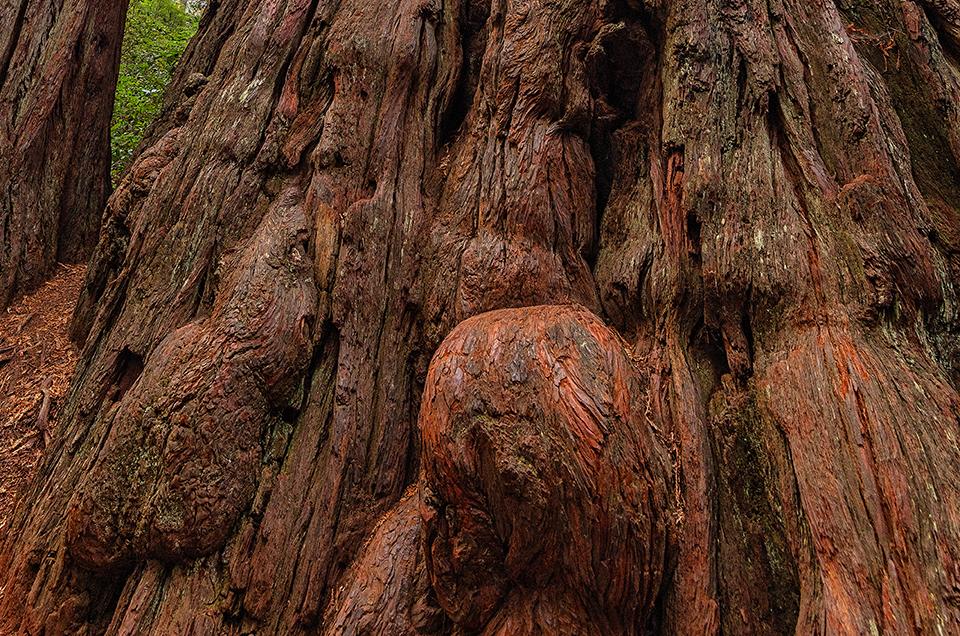
Coastal redwood burls, Redwood National and State Parks / Rebecca Latson
An easily-identifiable image is a must if you wish your viewing audience to understand the feature or process you’ve photographed. To that end, capture at least one overall view of your subject before getting into close-up specifics. This coastal redwood tree photographed at Lady Bird Johnson Grove Trail in Redwood National and State Parks is a good example. The entire tree acts as a frame of reference. From there, it’s easier to concentrate on details related to this particular tree (or any other coastal redwood).
In addition to providing a frame of reference, a wide-angle view presents environmental conditions within which your subject exists. In the image below, the audience sees the area of Blacktail Pond in Yellowstone National Park, a home where the bison do roam.
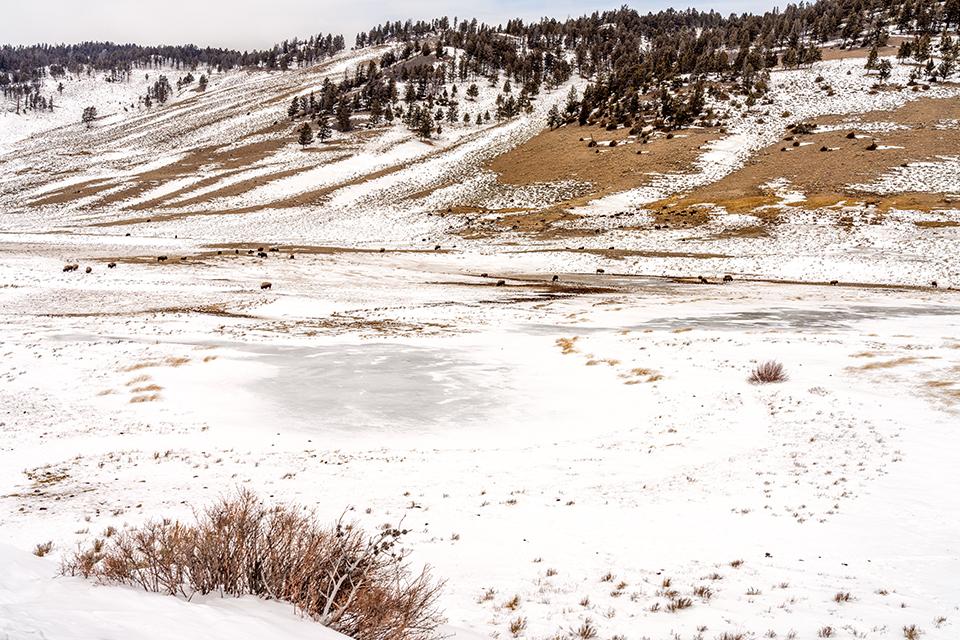
A bison herd at Blacktail Pond, Yellowstone National Park / Rebecca Latson
Note: when I write about wide-angle lenses, I’m referring to those with focal lengths between 11mm and 35mm.
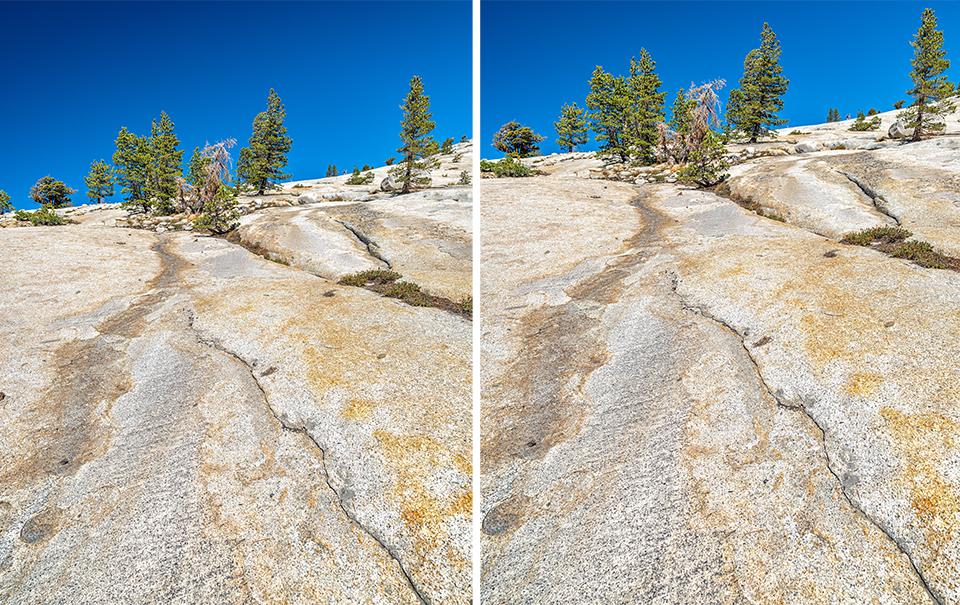
Try to get as definitive a shot as possible of the feature or process you wish to describe, so your viewing audience is not left guessing at what they see in the image. The two photos below provide examples of exfoliation within the granite High Sierras of Yosemite National Park. According to Encyclopedia.com, exfoliation is the term used to describe “the peeling away of sheets of rock millimeters to meters in thickness from a rock's surface, due a range of physical and chemical processes during weathering and exposure of formerly buried rock.” I wanted wider-angle shots to show the scale of this exfoliation process.
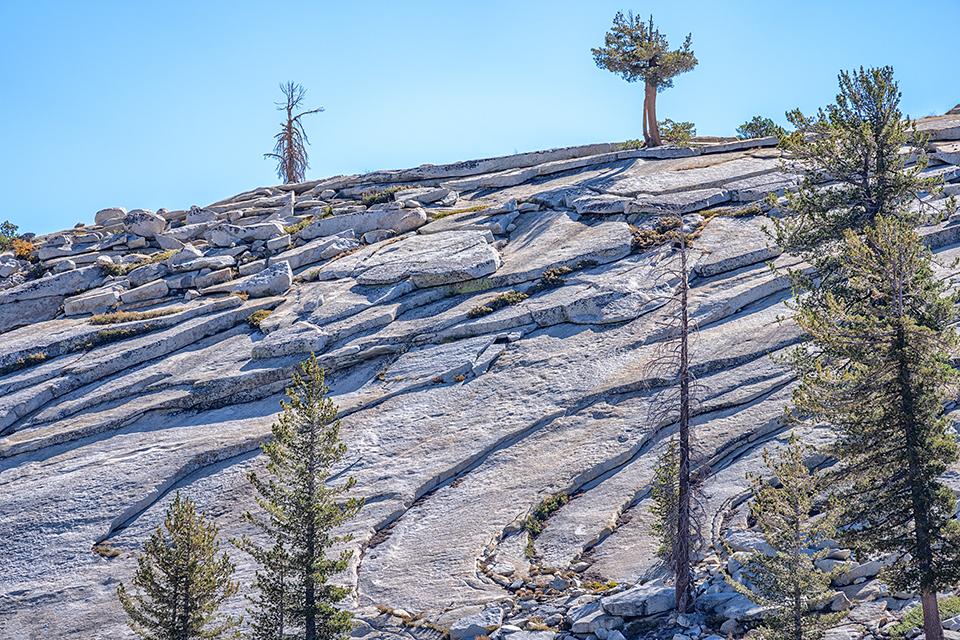
Granite exfoliation in the High Sierras, Yosemite National Park / Rebecca Latson
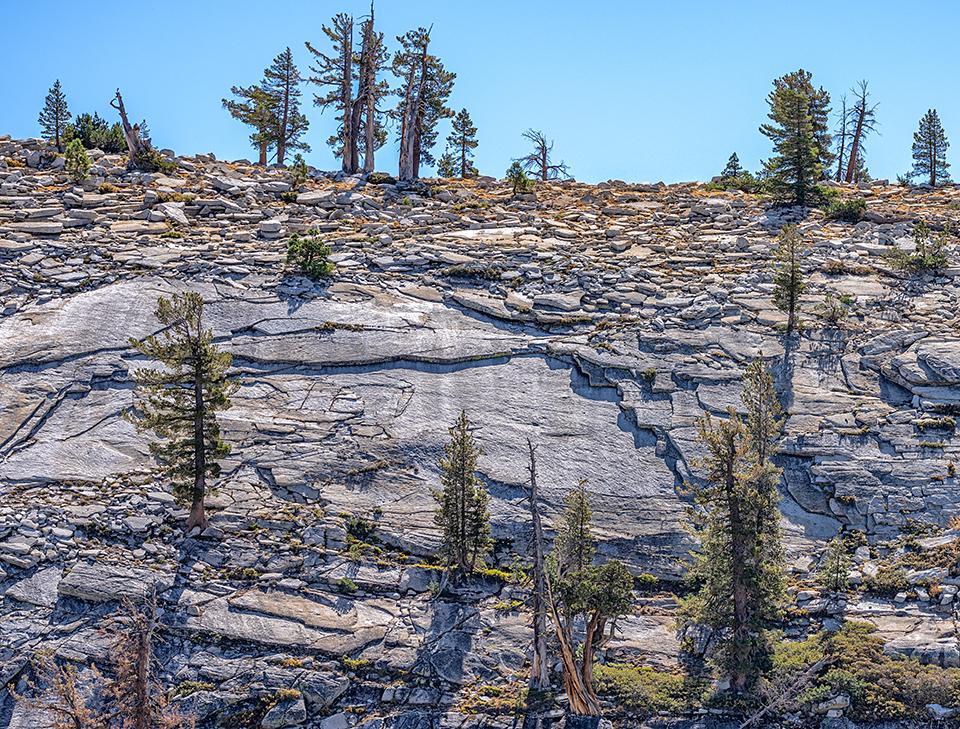
More granite exfoliation, Yosemite National Park / Rebecca Latson
Notice also how I include as much of the full length of trees as my lens would allow. Analogous to deciding how much of a person’s limbs to crop out of a portrait or group shot, the more you leave in while still focusing on your subject(s), the more aesthetically pleasing the image.
Negative space is the space you leave above, below, or around your subject. Sky, ocean, grassland, or a snowy white landscape are all good examples of negative space. Sometimes, a large amount of negative space really emphasizes wide-open vistas and/or the extreme smallness of your subject. Other times, too much negative space detracts from your subject.
Glacial striations etched into the granite near Olmsted Point, Yosemite National Park / Rebecca Latson
I wanted my audience’s view focused on the faint glacial striations in the weathered granite of the hills in Yosemite National Park near Olmsted Point. The left side of this image is the original with a little more sky (negative space) than the shot on the right, a copy with some of the sky cropped out. Ok, I know, some of you won’t see much difference. Some of you might, though. Which one do you think emphasizes the granite and glacial striations more? It’s a personal preference, so there are no wrong answers to this question.
Fill your frame with your subject or process. Upon closer inspection, those little black “rice grains” on the bright yellow-gold bacterial mat at Biscuit Basin in Yellowstone are revealed to be ephydrid fly larvae living in the warm-water environment.
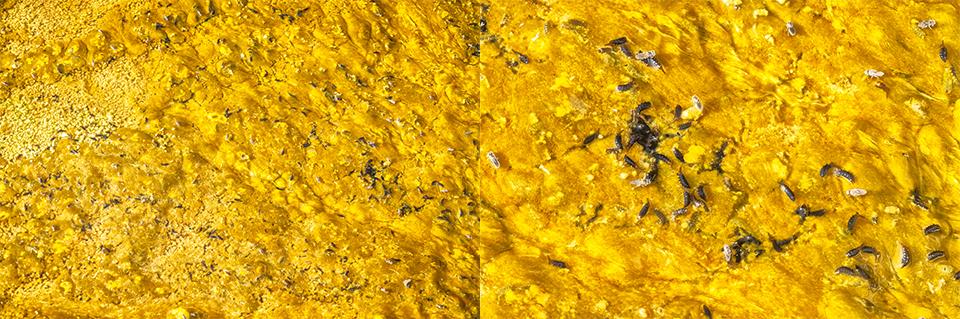
Ephydrid larvae on the golden bacterial mat, Biscuit Basin, Yellowstone National Park / Rebecca Latson
Try to include something recognizable in one or two of your images, like people, so your audience comprehends the scale of your subject while referencing it to something more familiar to them. If you include people in your images, it’s important to note how you include them. I contribute to Getty Images and I’ve had more than a few photos rejected because Getty thought the people in my shots were recognizable enough that a model release was warranted – even within a public place such as a national park. I don’t often pack model releases with me during my national park travels, so if my photos are not specifically for editorial purposes such as this Traveler article, then my people images are usually captured very far away, or with their backs turned to me.

Grandiosity, Mount Rainier National Park / Rebecca Latson
The examples above are all basics to help you with photo documentation. You can definitely find plenty of tips and techniques and other information online to broaden these basics. Just remember this piece of advice: when photographing a national park image with the intention of documenting something, remember to put a little thought into framing your photo. Composition of an image, whether for fine art or documentary purposes, is important and your audience will appreciate a well-composed shot which helps them recognize a feature, understand a concept, or grasp the mechanics of a process. Give the audience your best.

